
Vapor Smoothing: First Test
I arranged a small test today to gain some practical experience in smoothing some spare 3D printed ABS parts. The setup was simple:
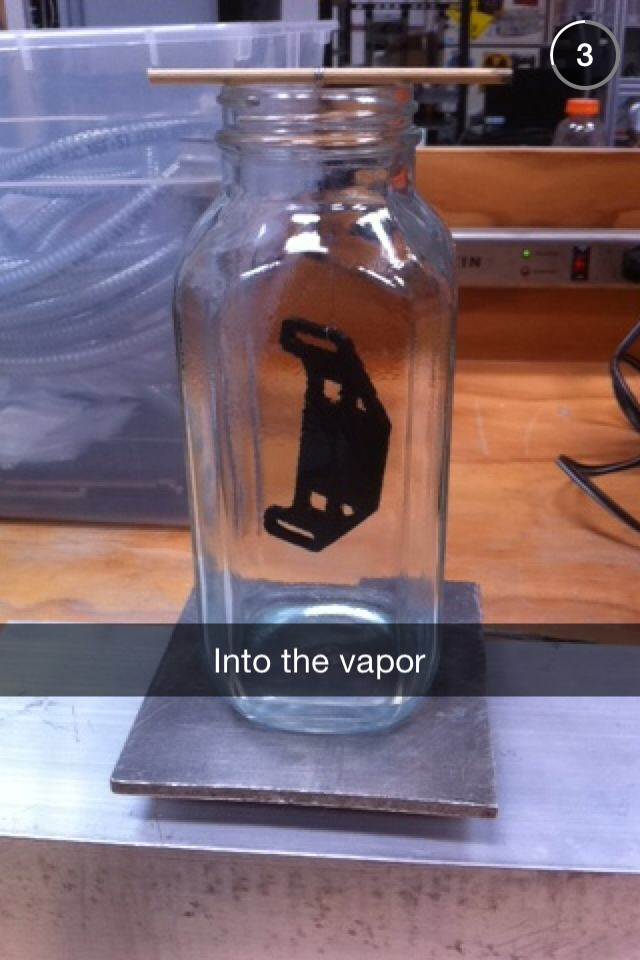
- a 100 Watt heater (which had been sealed into a bore in a chunk of copper) was attached to an aluminum plate with some thermal paste
- A small, glass mason jar with around 5 mm of acetone in the bottom was placed on the aluminum plate to be vaporized
- A spare ABS part was lowered into the jar with some fine steel wire for smoothing
Here's the general setup. I apologize for the photos all being screen shots from my snapchat - unfortunately I neglected taking actual photos and had to salvage these after.
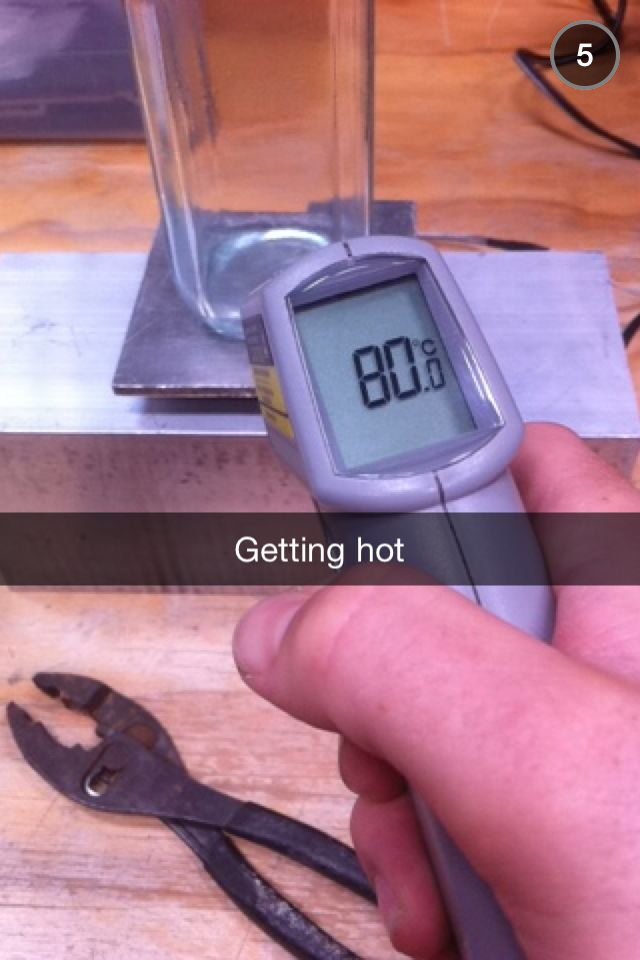
As shown, the aluminum plate heated up to around 80 C within around 10 minutes, and the vaporized acetone, visible by a slight condensation on the sides of the mason jar, filled to the brim of the container within five minutes.
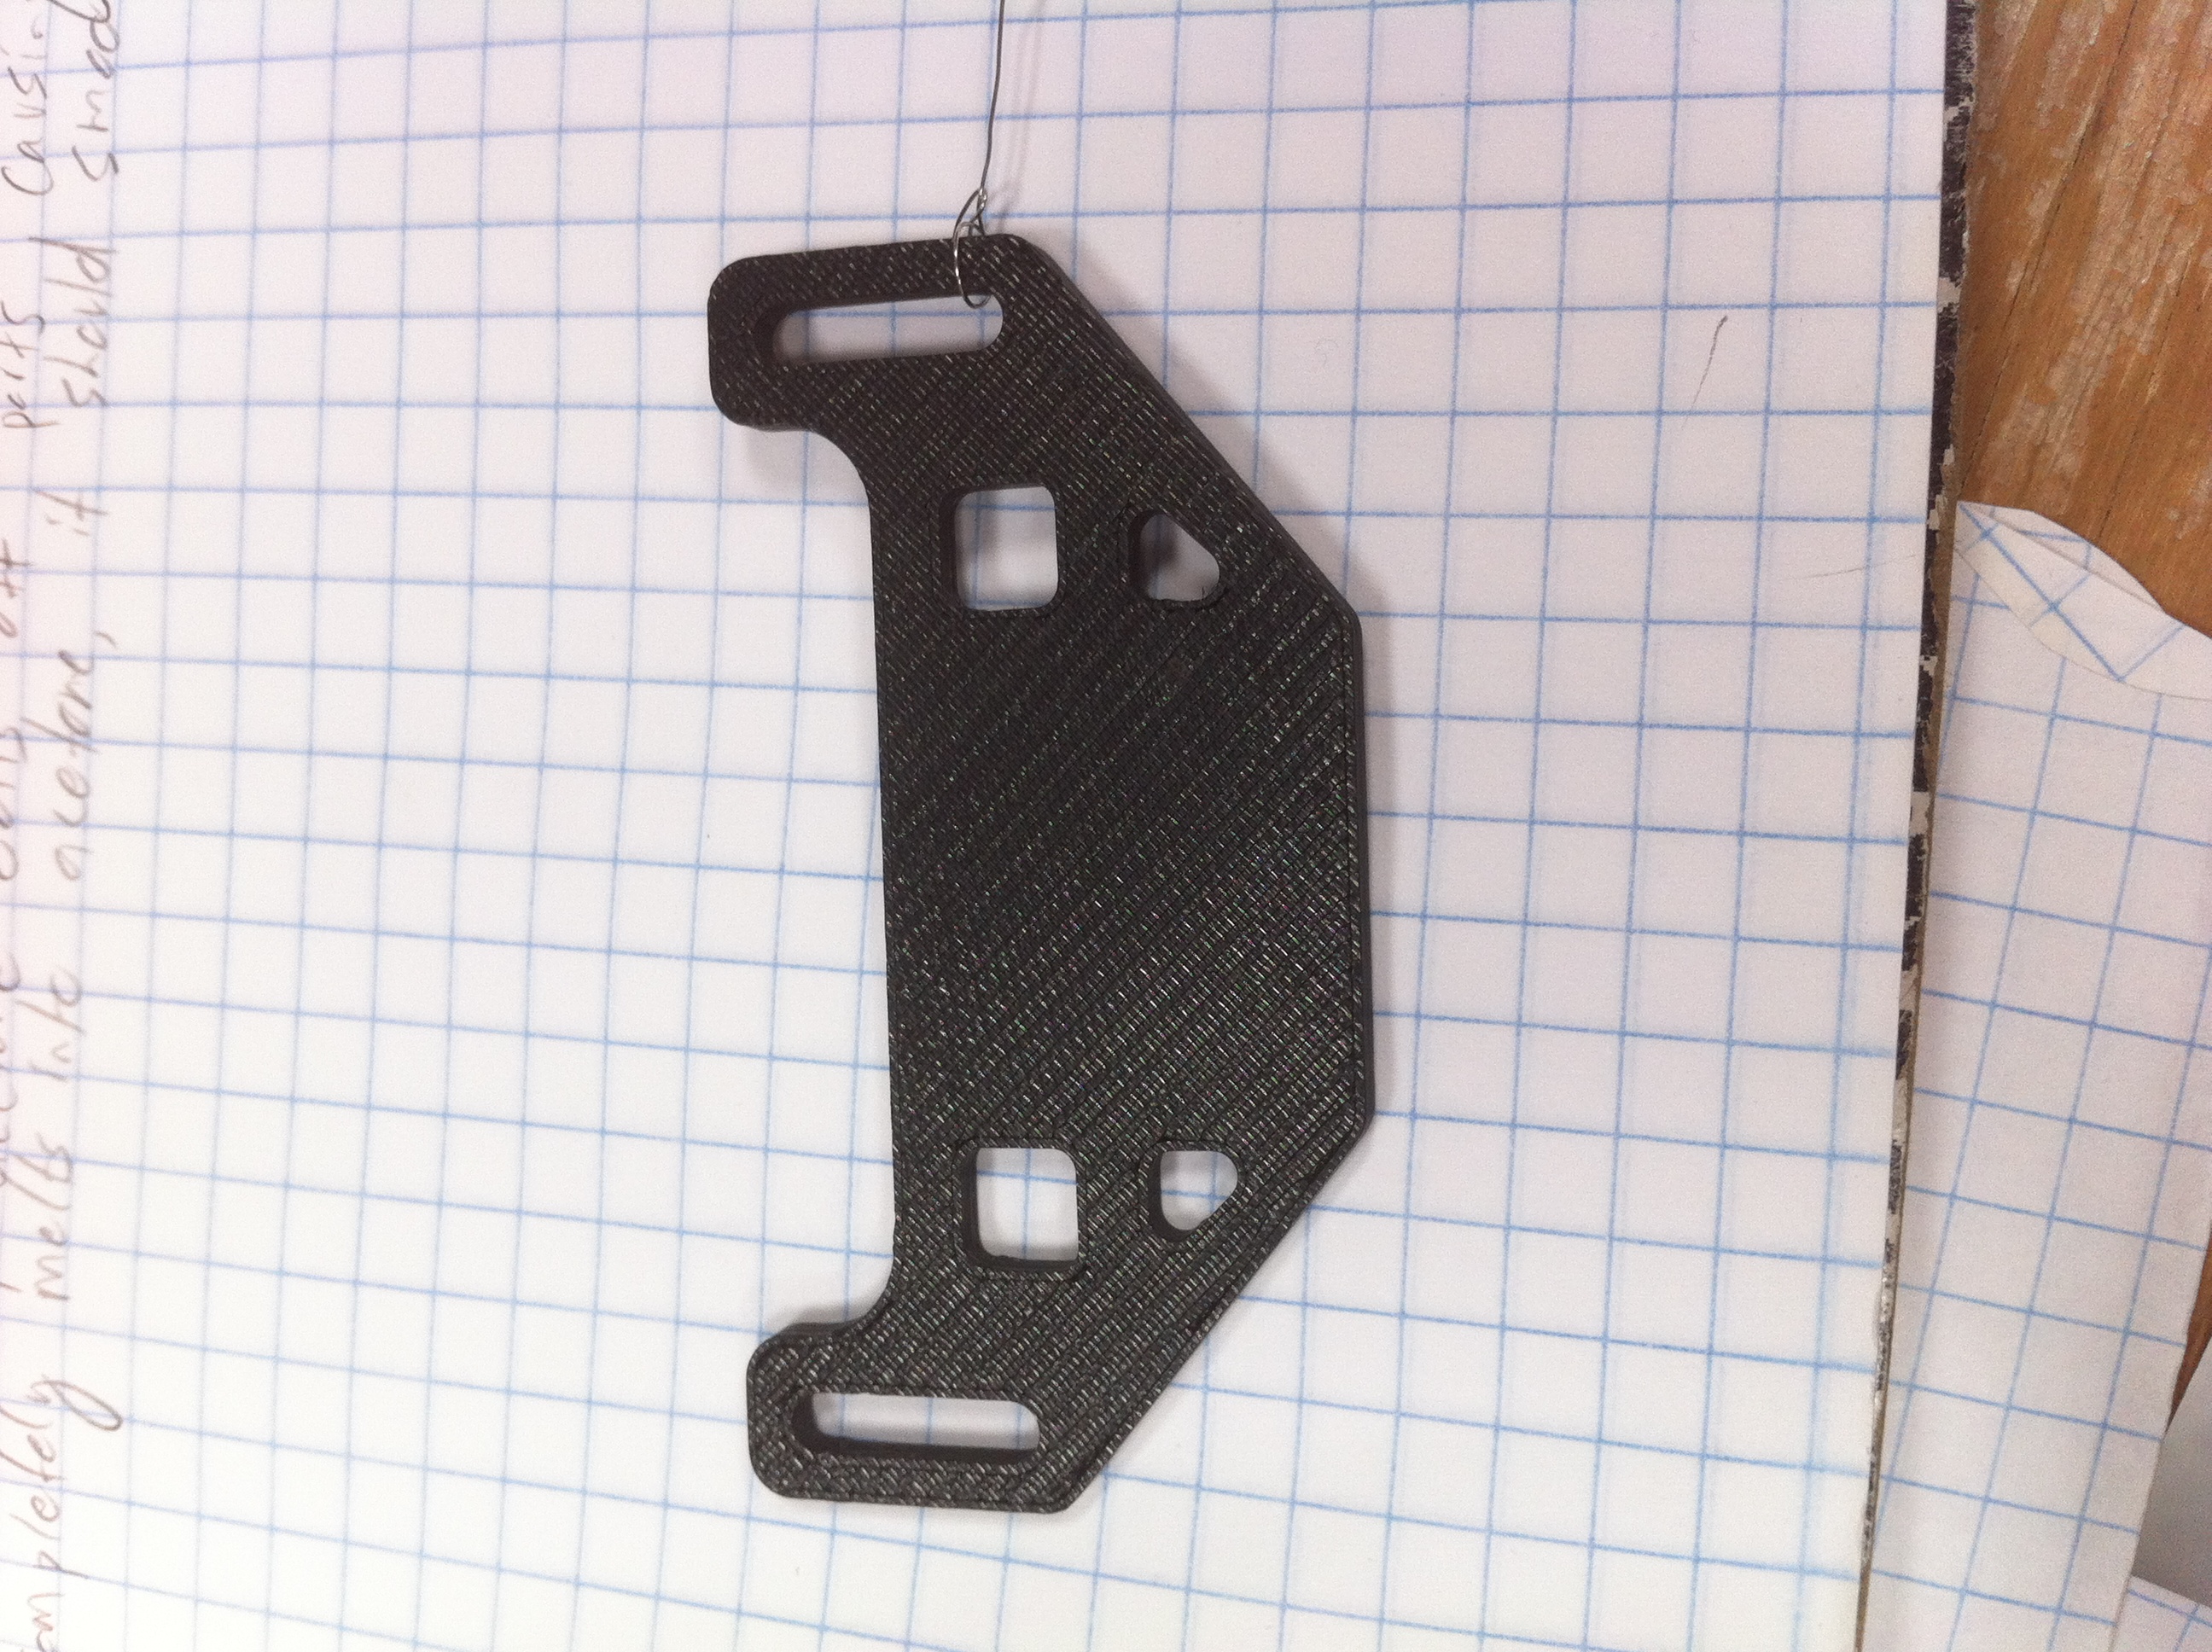
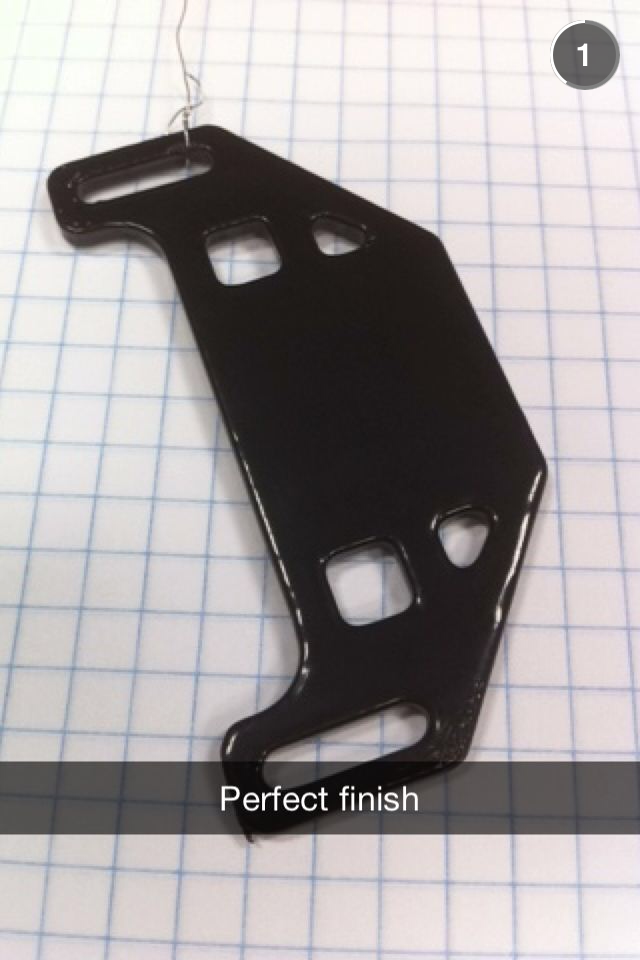
I dipped the part into the vapor and immediately saw the part begin to glisten - as though wet with enamel. The glistening continued all over the part until the gridlike texture of the 3D printed ABS completely disappeared. This only took around 40 - 50 seconds. The difference was quite visible, as shown by the two before and after photos.
The second part that was dipped (not pictured) was dipped in several intervals with a swishing/stirring motion to agitate the vapor and evenly effect the part.
The next step is to create a permanent setup that can accommodate larger parts and that has a feedback system using a thermocouple and a temperature switch to prevent the acetone from boiling over. The heater was hard to control, having only a laser thermometer the monitor the temperature, and twice the acetone in the bottom of the glass jar began to boil.
I ordered a 2.5 gallon glass jar to smooth larger parts in and will hopefully construct a functional semi-permanent setup in the next few weeks.